Turn cheap 5 gallon buckets into serious garage storage. Here are 15 smart ideas to hang, stack, roll, and sort your way to a tidy space.
Let's be honest about the humble 5 gallon bucket. It costs less than a sandwich, it stacks like a Russian doll, and it survives abuse that would crack a plastic tote in half. Yet most of us treat these workhorses like leftovers from a paint job, letting them pile up in the corner where spiders throw parties. What if that stack of buckets is actually the cheapest storage system you'll ever own? Your garage doesn't need a five thousand dollar cabinet wall. It needs a little imagination, a few screws, and a willingness to see a bucket as a drawer, a silo, a stool, or a rolling cart. Grab your drill, because we're about to turn plastic pails into the backbone of a garage you'll be proud to open.
1. Wall Mounted Bucket Racks That Reclaim Your Floor
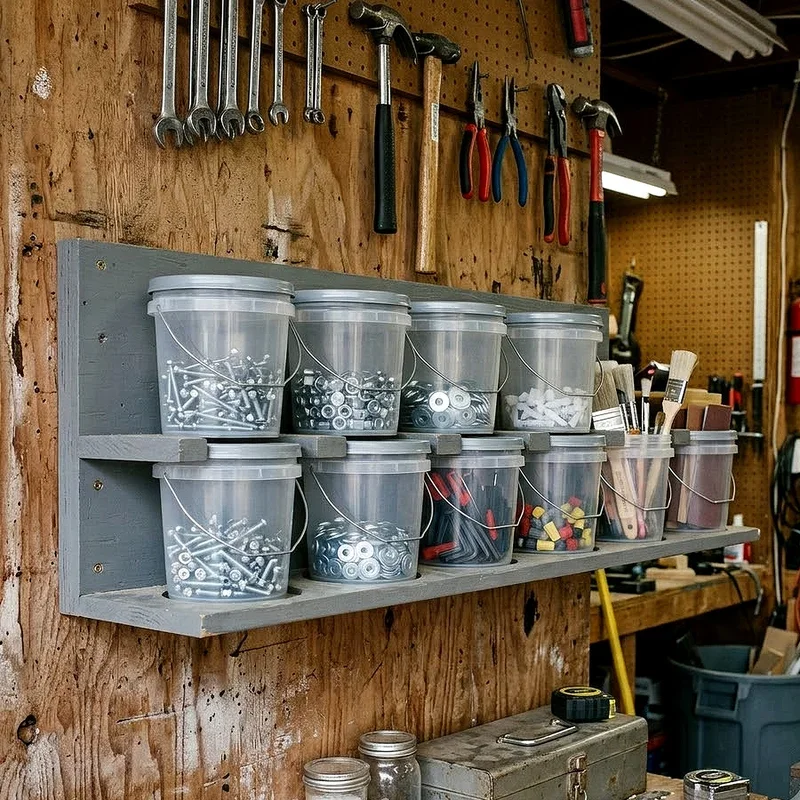
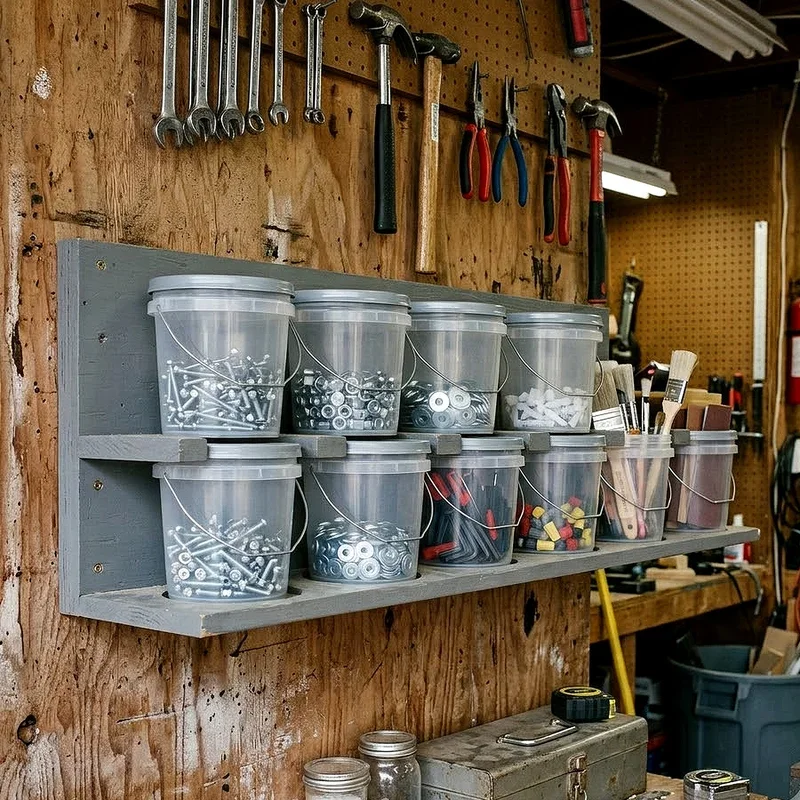
Your floor is prime real estate, so why let buckets squat on it like they pay rent? A simple wall rack, built from a 2x4 ledger and a few plywood rings, holds buckets at chest height where you can actually see inside them. Cut circles slightly smaller than the bucket rim so each one drops in and hangs by its lip, like a coffee mug on a hook. Screw the ledger into studs, never bare drywall, because a loaded bucket gets heavy in a hurry. Space the rings about fourteen inches apart so your knuckles have room to work. Suddenly the corner that used to swallow your snow shovel becomes usable again, and every bucket sits in its own labeled slot instead of nesting into one mystery stack you dread digging through.
2. Hang Buckets From Ceiling Joists for Dead Air Storage
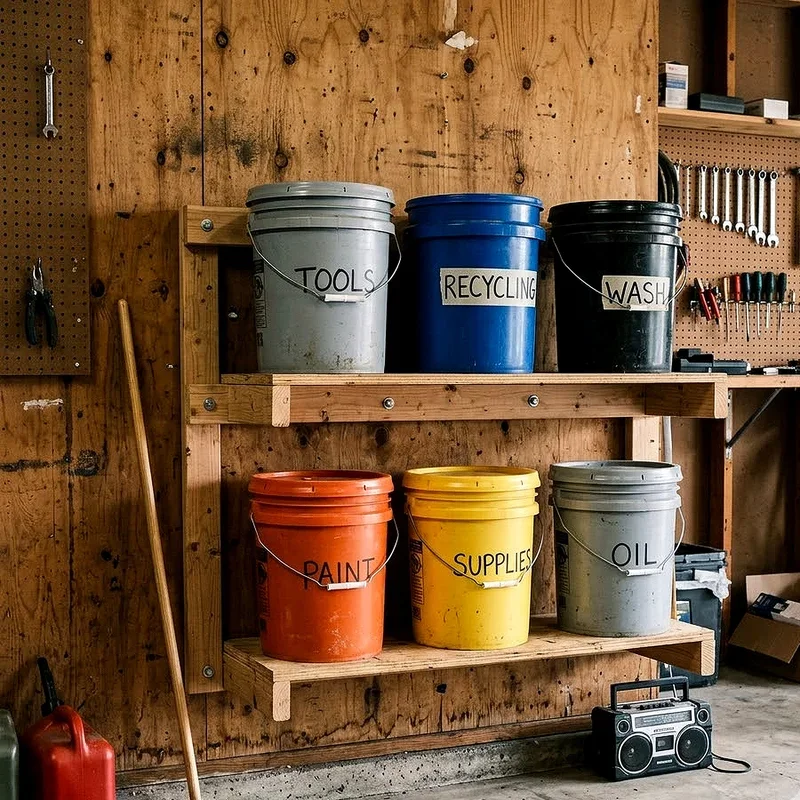
Look up. That empty space between your joists is doing absolutely nothing for you, and it's begging for a job. Screw heavy duty eye bolts into the joists, clip on a carabiner, and hang buckets by their steel handles right above the garage door track or along the perimeter. This works beautifully for seasonal stuff you touch twice a year, like holiday lights, camping cookware, or pool chemicals. Think of it as an attic you didn't have to build. Keep the load under about twenty pounds per bucket so the handle doesn't fatigue, and hang them where nobody will scalp themselves walking by. A quick tug with a hook on a pole brings them down when you need them, then they float back up out of your way.
3. Roll Everything Around on a Furniture Dolly Cart
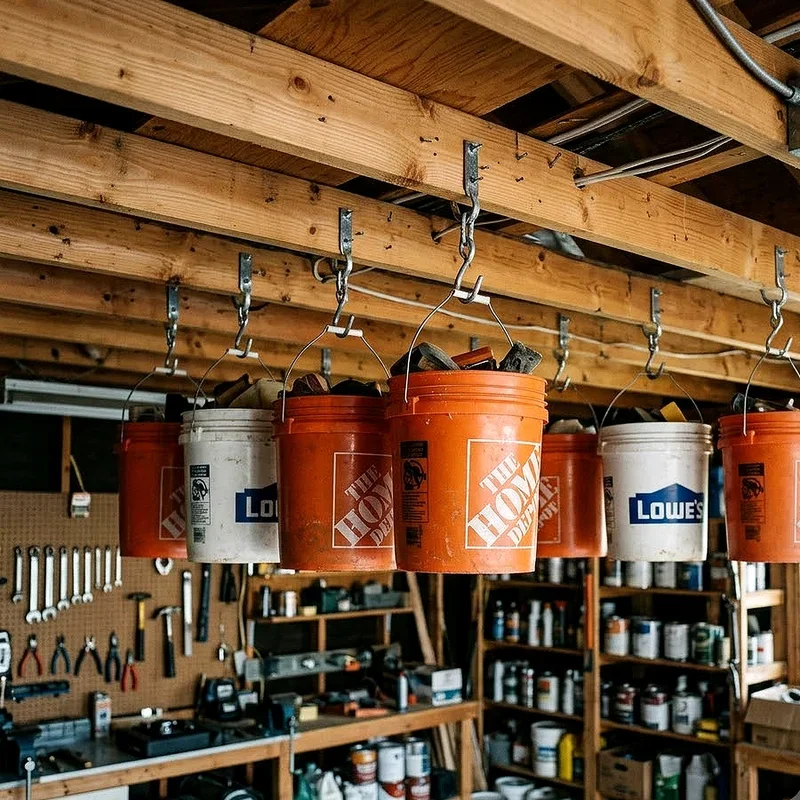
Some jobs happen at the car, some at the workbench, and some out by the fence line. Why haul buckets one at a time like a pack mule? Screw a plywood square onto a cheap furniture dolly, then add a lip or a few wood cleats so buckets can't slide off during a sharp turn. Four buckets fit comfortably on a standard eighteen inch dolly, giving you a mobile command center for car washing, potting soil, or deck staining. Roll it out, do the work, roll it back into a nook under the stairs. The whole thing costs about fifteen dollars and moves like it's on ice. Add a rope handle to the front edge and you can drag it behind you without bending over once.
4. Build a Stacked Bucket Tower With Cut Out Windows
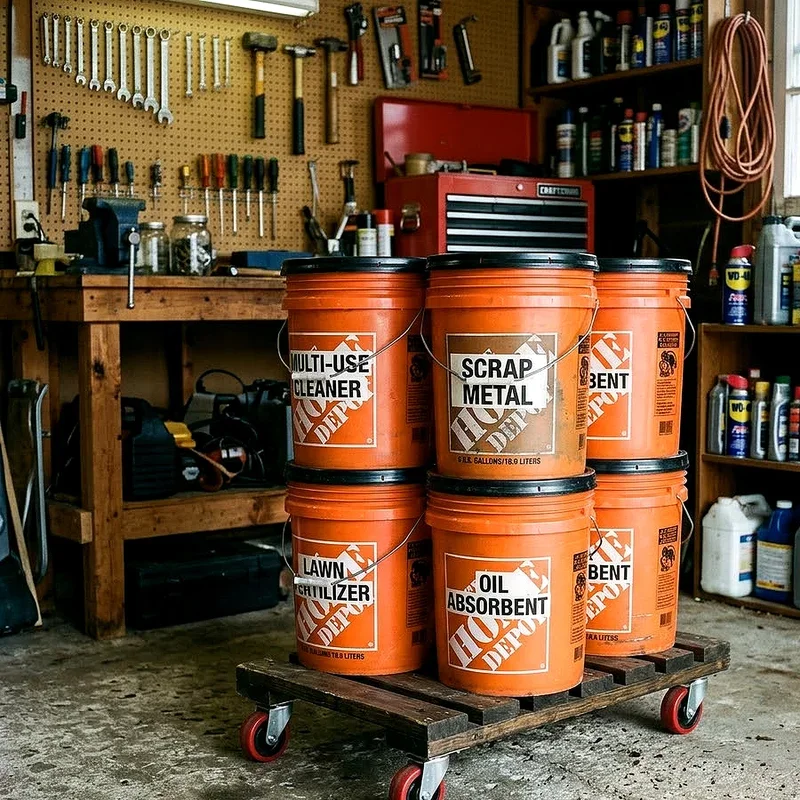
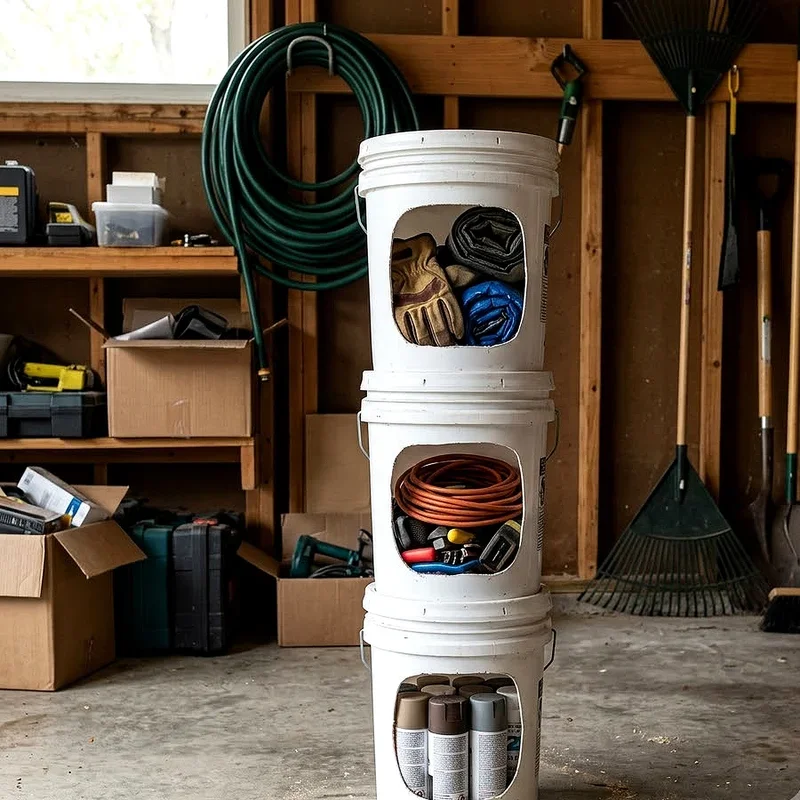
Stacked buckets look tidy, but they're useless if you can only reach the top one. Here's the fix. Use a jigsaw to cut a large arched window in the front face of each bucket, roughly two thirds of the way up, then stack them and screw the walls together where they overlap. Now you've got a vertical bin tower where every level opens from the front, sort of like a plastic honeycomb. It's perfect for shop rags, spray cans, gloves, or sanding discs. Anchor the top bucket to the wall with a strap so the tower can't tip when a kid tugs on it. Sand the cut edges smooth, because raw jigsaw plastic will happily bite a knuckle when you reach in fast.
5. Turn a Bucket Into a Tool Apron Caddy
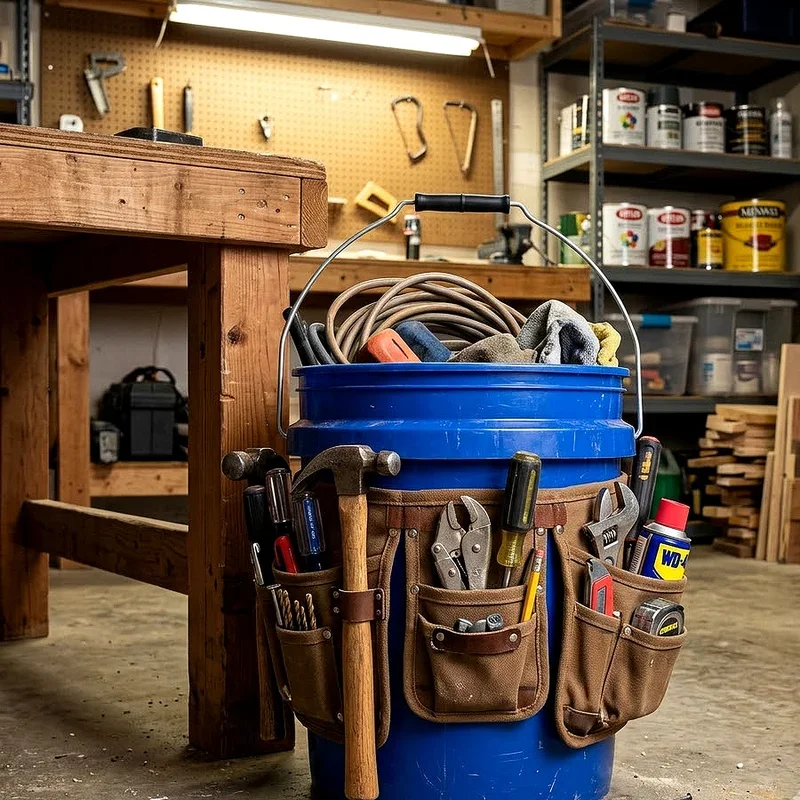
Ever carry a screwdriver, a level, and a box of screws up a ladder while wishing you had a third arm? A bucket apron solves that. These fabric sleeves slip over the rim and add dozens of loops and pockets around the outside, while the inside still holds your cordless drill and a tape measure. Suddenly one bucket carries an entire trim job. Hang it on a wall hook near the door so it's grab and go, and keep a second one loaded for plumbing or electrical work. Rather than digging through a toolbox that swallows small items whole, you see everything at a glance. When the job ends, drop the loose parts in the bottom and walk away without sorting anything.
6. Slide Out Bucket Drawers Under Your Workbench
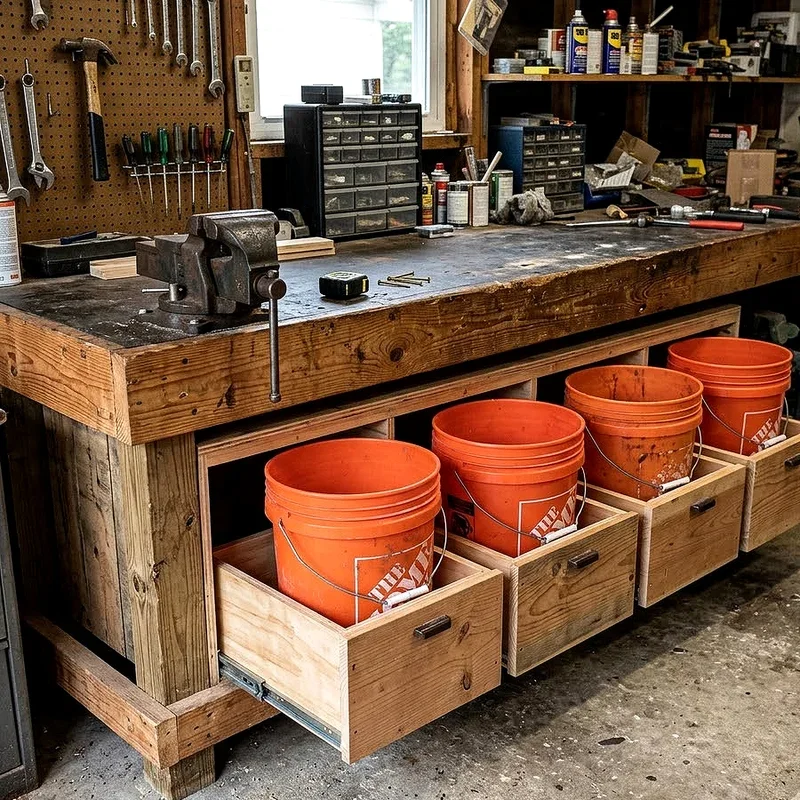
That cave under your workbench probably holds three spiders and a lost socket. Let's give it a purpose. Mount pairs of 2x4 rails under the bench top, spaced just wider than a bucket, then build shallow plywood trays that ride between them with buckets sitting inside. Pull a tray and the bucket comes out like a drawer, no crawling required. You can also skip the trays and screw scrap wood runners to the bucket sides so they slide directly on the rails. Either way, you turn wasted air into fast access storage for grout, fasteners, drop cloths, or off season yard chemicals. Label the front of each bucket with a paint pen, since tape peels off in a humid garage before summer even ends.
7. Create a Sports Gear Depot the Kids Can Reach
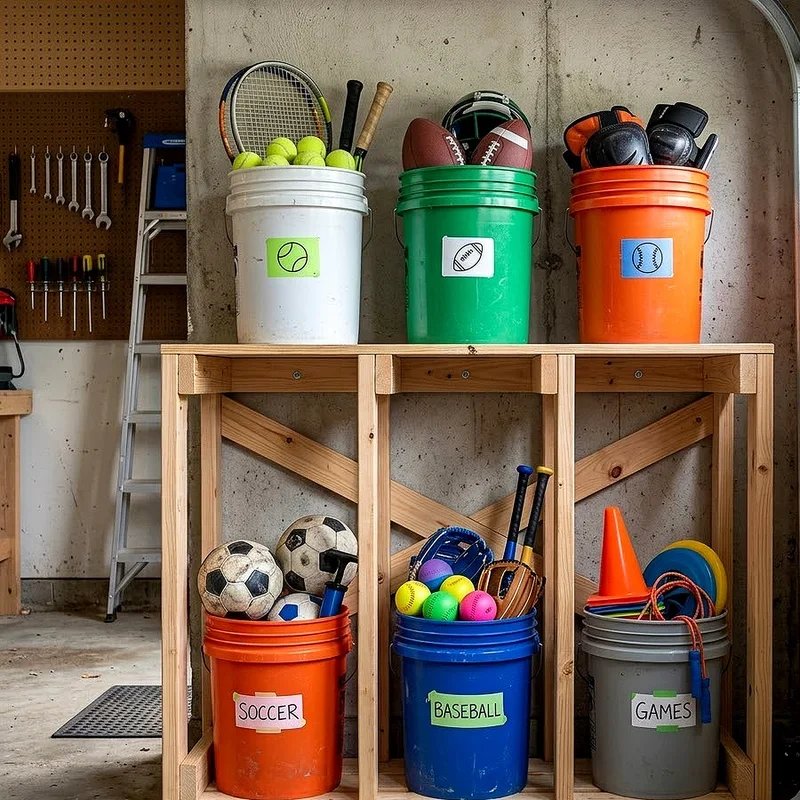
Sports equipment breeds in the dark. One soccer ball becomes four, cleats multiply, and suddenly you're kicking a helmet every time you get out of the car. Line up three or four buckets along a low wall, one per sport or one per kid, and the chaos gets a filing system. Basketballs and soccer balls drop right in without rolling away, bats and rackets stand up along the inside wall, and muddy cleats go in a dedicated bucket that you can hose out in March. Because the buckets sit at kid height, cleanup stops being your job. Ask any parent whether that's worth twenty bucks. Cut a couple of drain holes in the bottom of the cleat bucket so wet gear dries instead of souring.
8. Stand Long Handle Tools in Weighted Bucket Silos
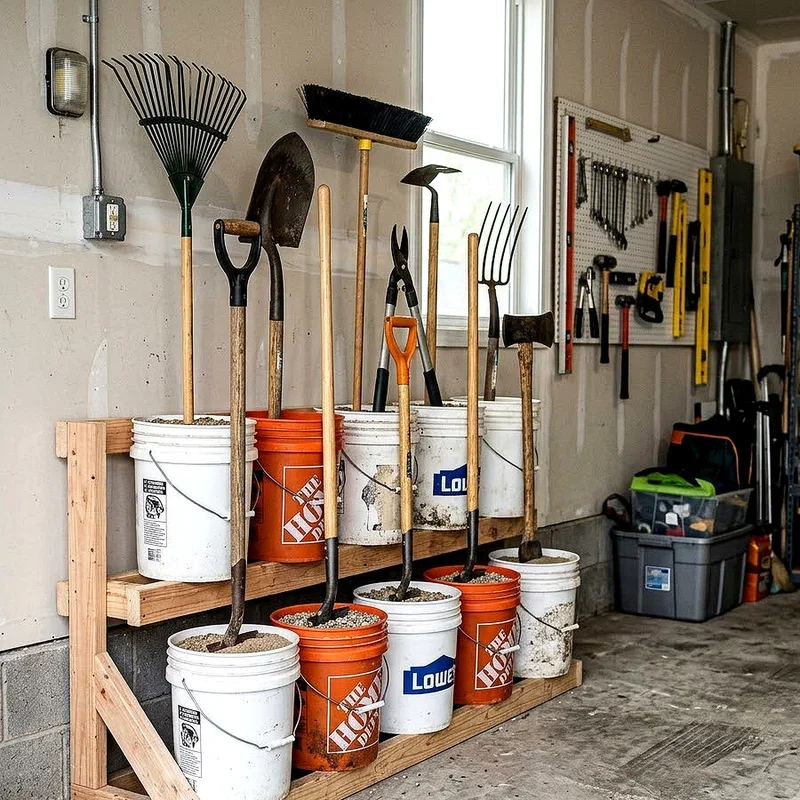
Rakes and shovels have a talent for falling over at the worst moment, usually onto the hood of your car. Turn a bucket into a silo and that ends. Pour three inches of concrete or a bag of gravel into the bottom for ballast, then drop your long handle tools in handle first. The weight keeps the whole thing planted like a tree, and the tools fan out where you can grab the one you want. For a fancier version, cut a plywood disc with holes drilled in a grid, then set it into the rim so each tool gets its own slot. Park two of these by the side door and your broom, rake, and edger stop playing dominoes every single week.
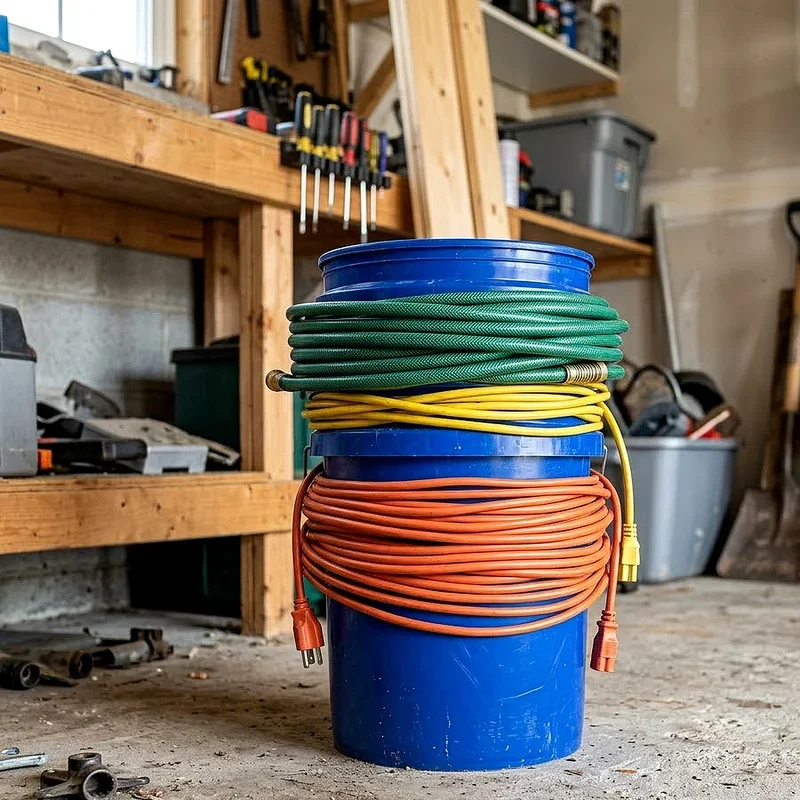
9. Coil Extension Cords and Air Hoses Around a Bucket
Tangled cords are the garage version of earbuds in a pocket. Somehow they knot themselves while you sleep. A bucket fixes this in two ways. Wrap the cord around the outside of an upside down bucket in wide loops, then slip the coil off as a neat bundle, or cut a slot near the rim and coil the cord inside so the plug end pokes out ready to grab. Air hoses behave the same way and stop kinking at the fittings. Store a few coiled cords in a single bucket by length, marking each with colored tape so you're not dragging a hundred foot cord across the driveway to run a shop light six feet away.
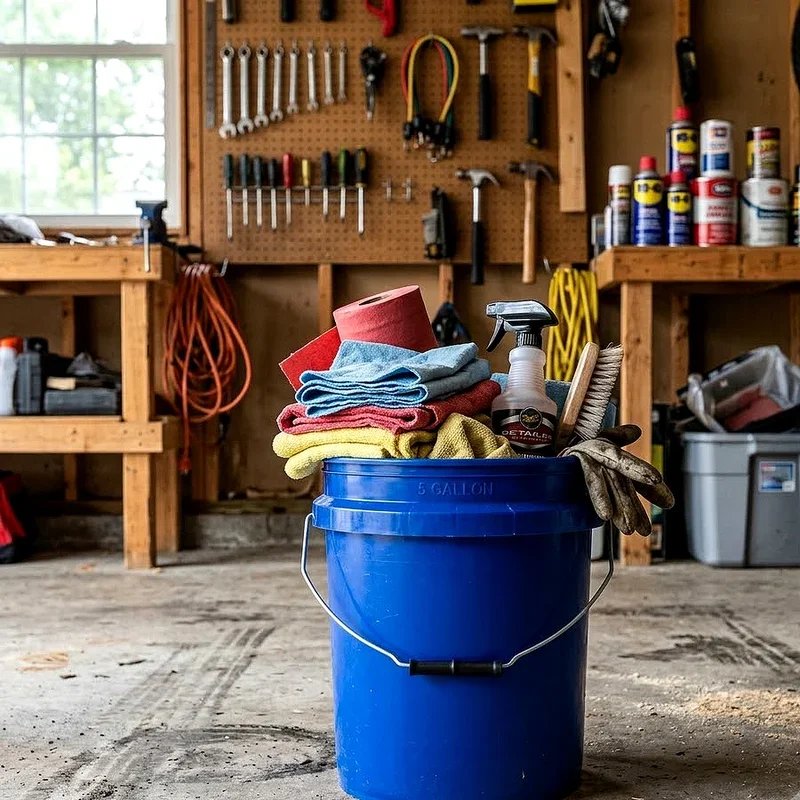
10. Keep a Dedicated Rag and Shop Towel Bin
Rags belong nowhere and end up everywhere, which is why yours are probably wedged behind the paint shelf right now. Give them a home. Dedicate one bucket to clean rags and a second to dirty ones, and the whole cycle runs itself: use, toss, wash, refill. Mount both on a wall rack near your workbench so you never wipe your hands on your jeans again. Here's the part people forget. Rags soaked in oil stain or linseed oil can actually generate heat as they cure, so never pile those in a sealed plastic bucket. Lay them flat outside to dry first, or keep a metal can with a lid for anything oily. Safety costs nothing but a little habit.
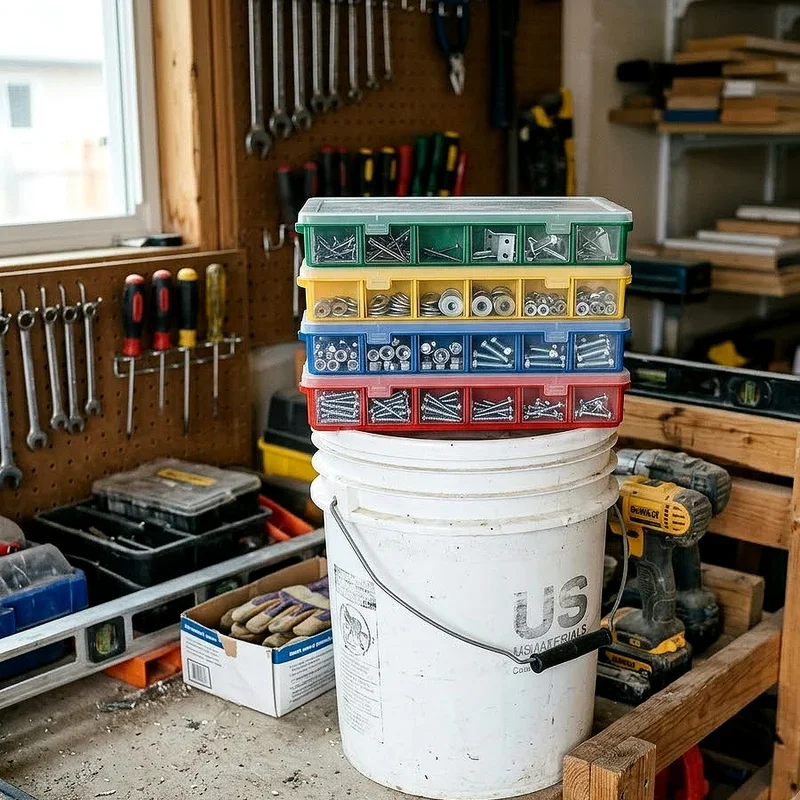
11. Sort Fasteners With Stacked Lid Trays
A coffee can of mixed screws is where good afternoons go to die. Bucket lids change that. Flip a lid upside down and it becomes a shallow tray with a raised rim, perfect for sorting deck screws, anchors, washers, or hardware from a project you half finished last spring. Stack several lids inside a bucket with small spacers between them and you get a layered sorting system that travels. Some folks cut lids into pie shaped dividers instead, dropping them into the bucket to create wedge shaped compartments. Either approach turns chaos into categories for free, since you already have more lids than you know what to do with. Label each layer with a marker so you're not lifting three trays to find one anchor.
12. Corral Paint Cans and Chemicals Safely
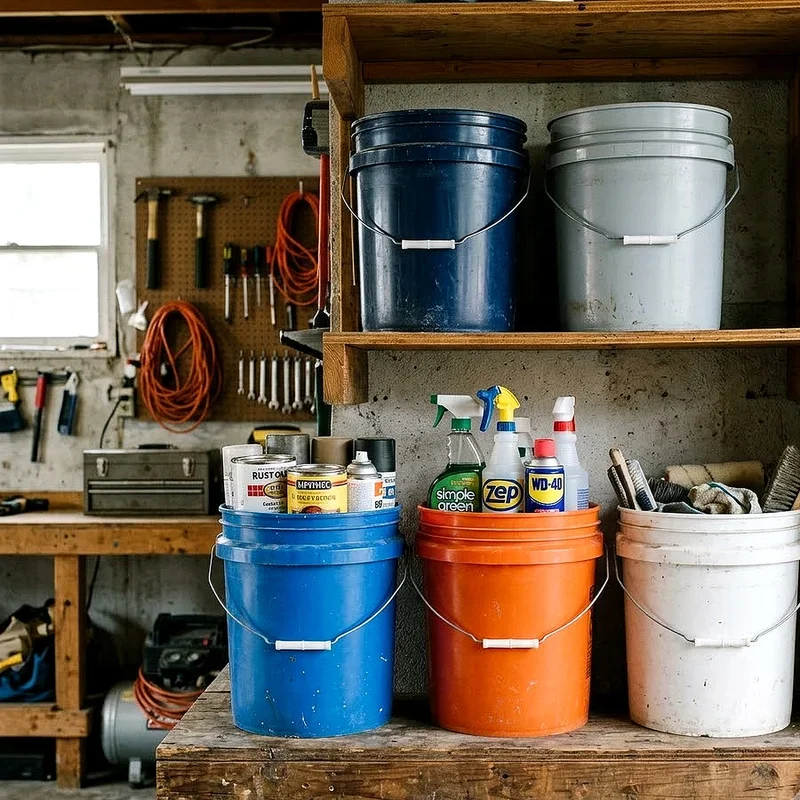
Paint cans rust, leak, and leave rings that never come off the concrete. A bucket acts like a moat around all of that. Stand four quart cans upright in a single bucket and you get instant secondary containment, so a slow leak stays inside plastic instead of soaking into your floor. Group by project or by room, and write the room name on the outside with a paint pen for touch up jobs later. The same logic applies to driveway sealer, weed killer, and automotive fluids, which absolutely should not share a shelf with anything you plan to eat. Snap a lid on, and you also keep fumes and curious pets out. One bucket, several problems solved, zero extra shelving required.
13. Store Bulk Goods Rodent Proof With Gamma Lids
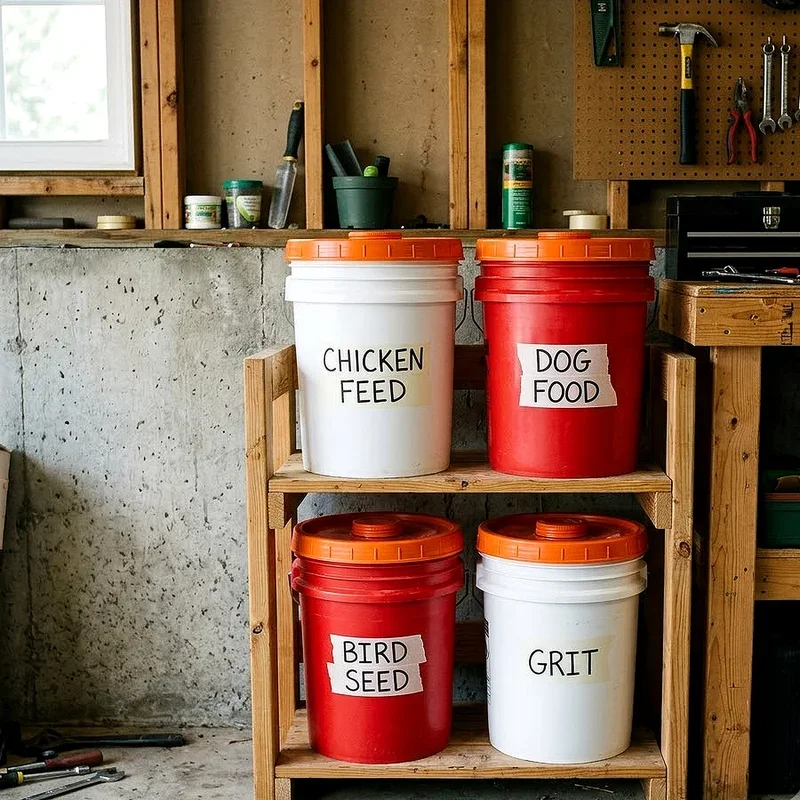
Mice consider a paper bag of dog food an open invitation. A bucket with a screw on gamma lid, on the other hand, is a bank vault. These lids snap onto the rim once and then thread open and closed like a jar, so you get an airtight seal without wrestling a stubborn plastic ring every morning. Use them for pet food, birdseed, grass seed, chicken feed, ice melt, or charcoal, all of which attract pests and absorb moisture in an unheated garage. Line them up under a shelf and scoop straight from the bucket. Choose food grade buckets if anything inside will be eaten, since old drywall compound pails can hold residue that you really don't want in your dog's dinner bowl.
14. Pack a Winter Salt and Roadside Emergency Station
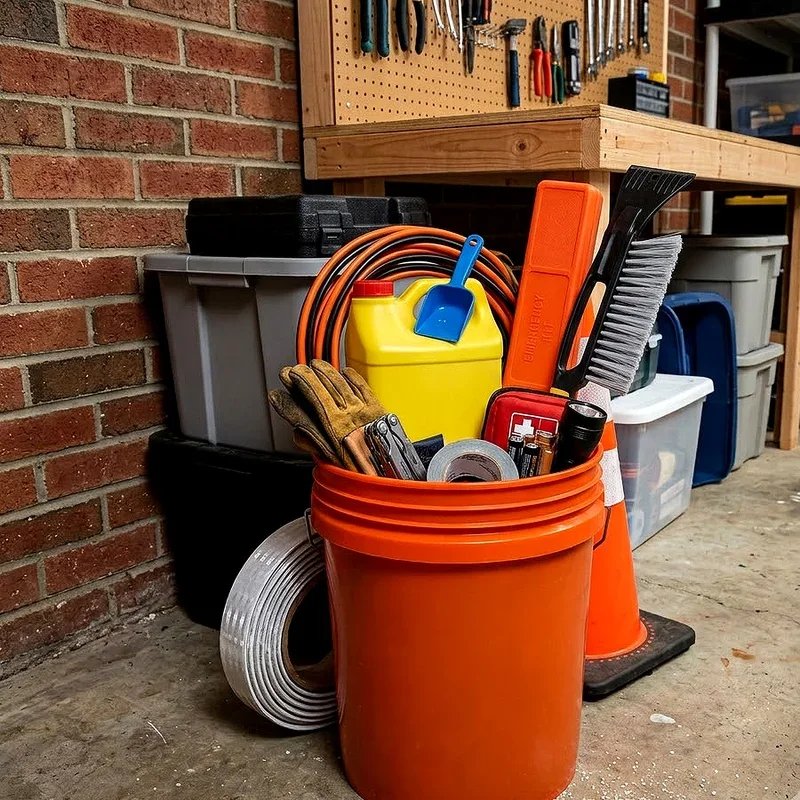
Winter arrives every year, yet somehow it always feels like an ambush. Beat it with a bucket. Fill one with rock salt or sand, drop a plastic scoop inside, and park it by the door you actually use, not the one buried behind the lawnmower. Then build a second bucket as a roadside kit with jumper cables, a folding shovel, a flashlight, gloves, a blanket, flares, and a bag of kitty litter for traction. Snap on a lid and that bucket rides in your trunk from November through March, or slides into a wall rack the rest of the year. When your neighbor slides into a ditch at seven in the morning, guess whose garage becomes the hero.
15. Build a Padded Bucket Stool With Hidden Storage
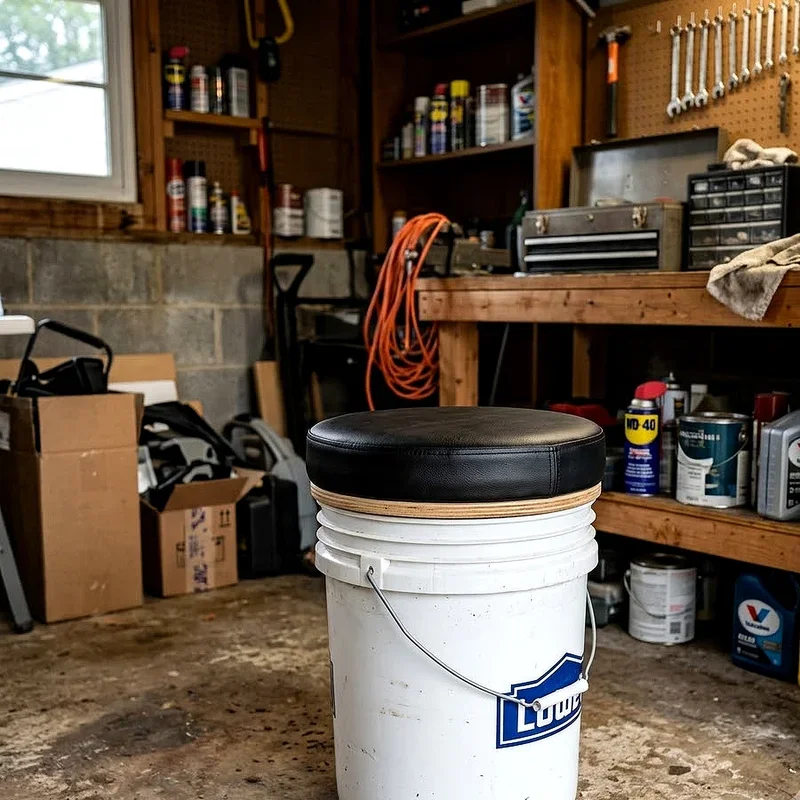
Why should a seat only be a seat? Buy a padded swivel lid or make one from a plywood disc, a slab of foam, and a stapled square of vinyl, then snap it onto any bucket. Now you have a stool you can drag to the car door while you change brake pads, and every tool you need for that job rides inside the seat. It's storage wearing a disguise. Add a fifth caster plate or a small dolly underneath and you can scoot along the length of the vehicle without standing up. Keep two around: one loaded for automotive work, one for garden potting. They stack when guests come over, which is more than your rolling tool chest can claim.
Conclusion
Here's the truth about garage organization. The expensive systems rarely fail because they're poorly built, they fail because we stop using them. Buckets win precisely because they're cheap, replaceable, and honest about what they are. Hang one, roll one, stack a tower, or bolt a lid tray inside and you've solved a real problem for a few dollars. Start with two ideas from this list this weekend, not fifteen. Once your floor clears and you can actually park the car again, the rest of these projects will practically build themselves.
Read next: 15 Closet Storage Ideas for Organized Living
Frequently Asked Questions
Q1: Are 5 gallon buckets strong enough to hang from the ceiling?
A: Yes, if you use joist mounted eye bolts and keep each bucket under twenty pounds.
Q2: Can I store food or pet food in any bucket?
A: Only use food grade buckets, since old chemical or drywall pails may hold harmful residue.
Q3: What's the easiest bucket project for a total beginner?
A: A wall rack with plywood rings takes about an hour and needs only basic tools.
Q4: How do I keep buckets from cracking in cold weather?
A: Choose thicker HDPE buckets and avoid dropping them or overloading them when temperatures drop sharply.
Q5: Where can I get free 5 gallon buckets?
A: Ask bakeries, delis, restaurants, or car washes, since most discard clean buckets every single week.
Stay up to date with our latest ideas!