How to Set Up a Safe Scaffold for Home Renovations and Exterior Painting
Learn how to set up a safe scaffold for home renovations and exterior painting to ensure stability, safety, and smooth project progress.
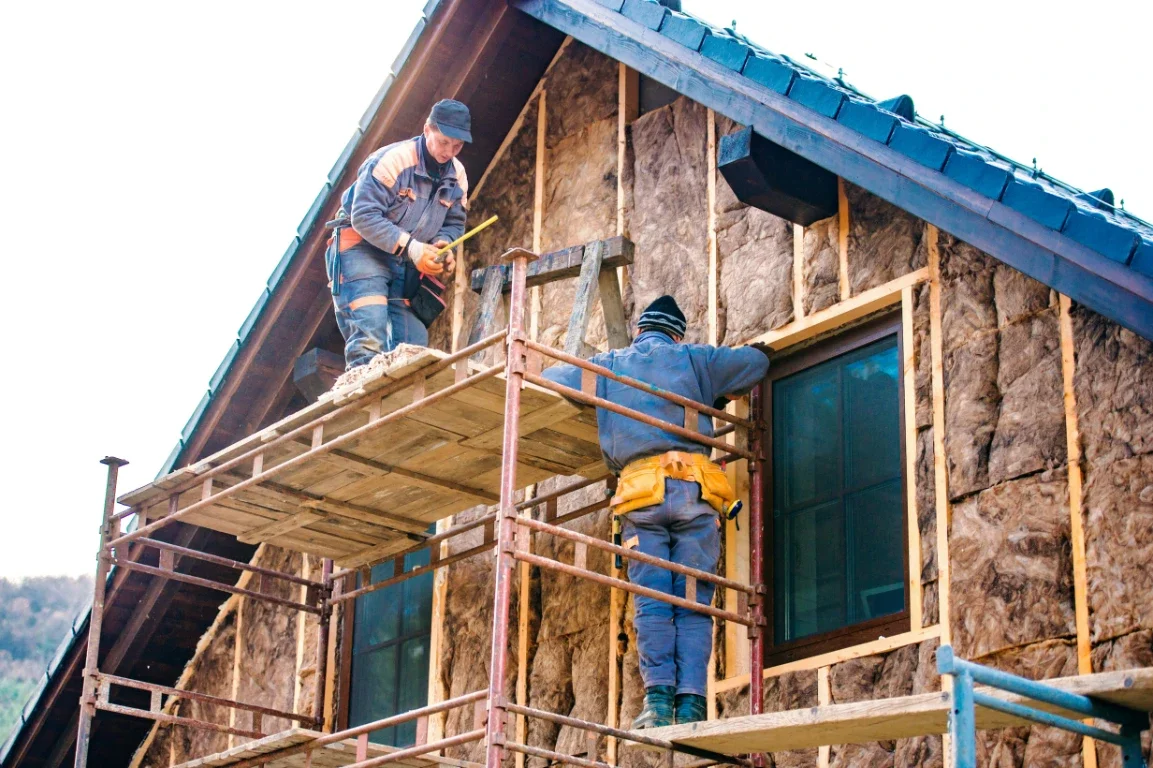
Working at height makes any home project riskier. A sturdy scaffold gives you stability, reach, and safety - if it’s built correctly.
This guide walks you through how to set up a safe scaffold for home renovations and exterior painting.
You’ll learn how to inspect, assemble, and maintain your scaffold safely from start to finish.
Why Scaffold Safety Matters for Home Projects
Falls are one of the most common causes of injury in home improvement work. According to OSHA, many scaffold accidents happen because parts were damaged, guardrails were missing, or the surface wasn’t level.
A properly assembled scaffold gives you a flat, steady workspace - reducing strain and fall risk during painting, siding, or repair work.
Scaffold safety isn’t just about following rules. It’s about making sure you and anyone helping you go home safely every day.
Scaffold vs Ladder: Which Is Safer for Exterior Work
Ladders are handy for small touch-ups, but scaffolds offer more stability and comfort for extended tasks.
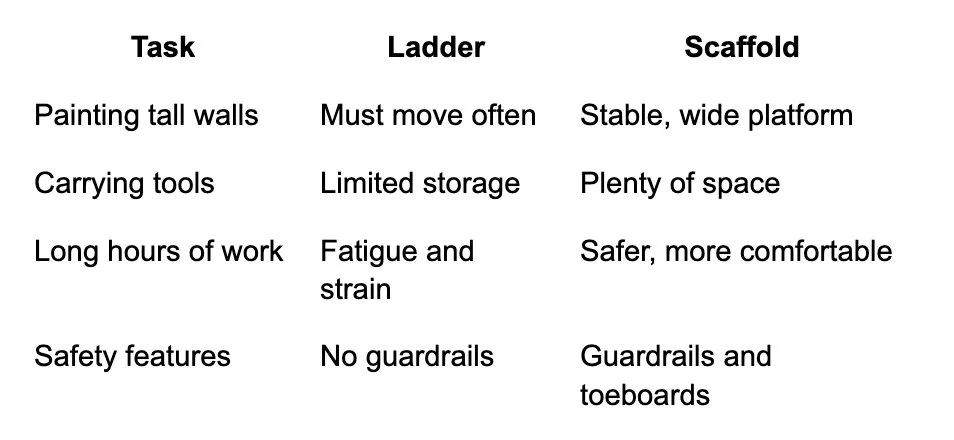
When working on large surfaces or multiple stories, scaffolds provide the safer and more efficient option.
Types of Scaffolds for Home Renovations
Not all scaffolds are built the same. Choose one that fits your workspace and project:
Frame scaffolds: Common for exterior painting and siding. Simple to assemble and sturdy.
Rolling scaffolds: Mounted on locking casters. Ideal for flat, smooth surfaces like garages or patios.
Suspended scaffolds: Hang from the roof or structure. Used for tall buildings—best left to trained professionals.
Folding or compact scaffolds: Good for small home projects or tight spaces. Easy to store and move.
Always check the manufacturer’s load rating and height limit before use.
Plan Your Worksite Before You Build
A good plan prevents unsafe shortcuts. Before setting up your scaffold:
Inspect the ground. Choose a level, solid area without soft spots or holes.
Check for overhead hazards. Look for wires, branches, or eaves.
Measure your space. Ensure enough room for the scaffold’s footprint and safe access.
Watch the weather. Avoid windy or wet conditions.
Plan access. Know where you’ll climb up and where tools will be stored.
A clean, organized workspace reduces the risk of tripping or tipping.
Essential Personal Protective Equipment (PPE)
Always wear safety gear when assembling or working on scaffolds:
Hard hat
Safety boots with good traction
Gloves for handling metal parts
Safety glasses
scaffold harness and lanyard when working above 10 feet
Protective equipment helps prevent common injuries like slips, falling tools, or head bumps.
Inspect All Equipment Before Setup
Before assembly, inspect every piece of your scaffold:
Frames and braces: No cracks, bends, or rust
Pins and locks: Tight and functional
Planks: Dry, free of rot or split
Casters and base plates: Roll smoothly and lock securely
Guardrails and connectors: No damage or missing parts
Replace any part that looks questionable. A single weak link can cause failure when weight is applied.
Build a Strong and Level Base
Your scaffold is only as safe as its foundation.
Lay mudsills or base plates. Spread the load evenly on stable ground.
Position the first frames. Stand them upright and connect cross braces.
Check level. Use a spirit level and adjust with screw jacks if needed.
Secure casters. If using wheels, lock them firmly before climbing.
Anchor when required. For multi-story work, tie the scaffold to the structure for stability.
Never balance a scaffold on bricks, blocks, or uneven boards.
Assemble the Scaffold Frame Safely
Follow the correct sequence:
Stack and connect frame sections with locking pins.
Install cross braces at each level.
Add planks tightly side by side.
Attach guardrails and toeboards.
Inspect joints and locks before climbing.
Use both hands when climbing and always face the scaffold. Never climb the braces.
Add Platforms, Guardrails, and Toeboards
Your working platform must be solid and enclosed:
Planks: Use scaffold-grade boards.
Guardrails: Install top (42 inches) and midrails.
Toeboards: Keep tools and materials from falling.
Access: Use a built-in ladder or attachable access point.
This setup creates a secure work area and meets standard safety requirements.
Check Load Limits and Weather Conditions
Each scaffold has a maximum load rating—never exceed it.
Typical ratings:
Light duty: 25 lbs/ft² (painting, light repairs)
Medium duty: 50 lbs/ft² (small masonry or heavy tools)
Heavy duty: 75 lbs/ft² (large-scale work)
Add up the weight of people, tools, and materials to stay within limits.
Avoid using scaffolds in strong wind, rain, or icy conditions. Wet planks are slippery, and wind can destabilize the structure.
Daily Safety Checks and Maintenance
Inspect before every use:
Ensure all locking pins and braces are engaged.
Remove debris, paint, or oil from planks.
Check base plates for movement.
Look for signs of corrosion or cracks.
Keep tools secured.
After each project, clean and store parts in a dry place. Regular maintenance extends lifespan and reliability.
Common Mistakes to Avoid
Even careful workers can make errors. Avoid these:
Building on uneven or soft ground
Failing to install guardrails
Using damaged or makeshift planks
Overreaching beyond the platform edge
Ignoring daily inspection
Working during high winds
Taking a few extra minutes to double-check your setup prevents serious accidents.
Example: Setting Up for a Two-Story House Painting
Here’s how a typical homeowner setup might look:
Choose a level area next to the wall.
Lay two mudsills and install base plates.
Build two frame sections high.
Add planks, guardrails, and toeboards.
Anchor the scaffold to the wall at midpoint.
Inspect before climbing.
This setup provides a safe, sturdy workspace for painting, sanding, or siding a two-story home.
Summary
Setting up a scaffold the right way protects you, your helpers, and your project. To recap:
Plan your worksite carefully.
Inspect all components before setup.
Build a level, anchored base.
Add guardrails and toeboards.
Follow load limits and daily inspections.
Safety takes time—but it saves far more in the long run.
FAQs About Scaffold Setup
1. How high can a homeowner safely build a scaffold?
Generally up to about 20–25 feet. Above that, professional setup and anchoring are recommended.
2. Can I use a scaffold on uneven ground?
Yes, if you use base plates and adjustable jacks. Never use bricks or blocks for leveling.
3. Do I need a harness?
Yes, for any platform over 10 feet high. Attach it to a secure anchor point.
4. How often should I inspect a scaffold?
Before each use and after any weather event that could affect stability.
5. What’s the safest way to move a rolling scaffold?
Clear the platform, unlock the wheels, and move it slowly with help from another person.
Stay up to date with our latest ideas!