15 Clever Ribbon Storage Ideas to Organize
Discover 15 ingenious ribbon storage ideas that transform chaos into creativity. From repurposed household items to custom organizers, these practical solutions will revolutionize your crafting space and spark inspiration.
Have you ever abandoned a crafting project because you couldn't face the tangled mess of ribbons hiding in your supply drawer? Or perhaps you've repurchased a spool of satin ribbon, only to discover three identical ones buried in your crafting chaos days later? We've all been there! Ribbon collections have a magical way of transforming from organized treasures into wild, unruly beasts that seem to multiply and tangle with gleeful abandon. But what if I told you that taming this colorful chaos isn't just possible—it's actually simple with the right approach? Think of your ribbon collection as a beautiful symphony orchestra where each piece deserves its proper place to create harmony rather than cacophony. Whether you're a seasoned crafter with rolls upon rolls of specialty ribbons or a gift-wrapping enthusiast with a modest collection, these 15 clever storage solutions will help you untangle your creativity and transform your crafting space into an organized haven that sparks joy and inspiration every time you enter. Let's roll out these ideas and wrap up your storage problems for good!
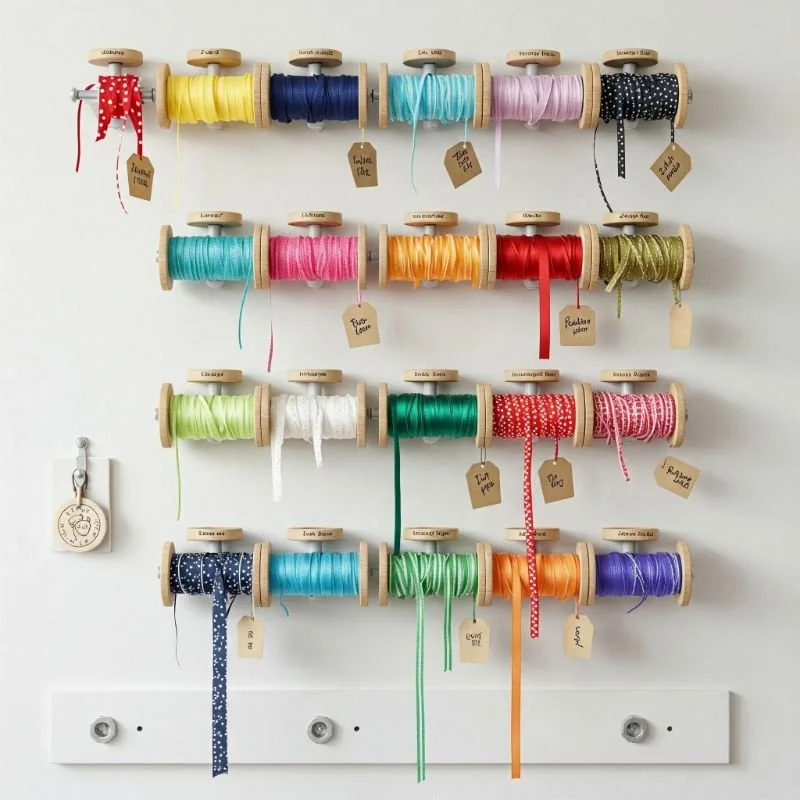
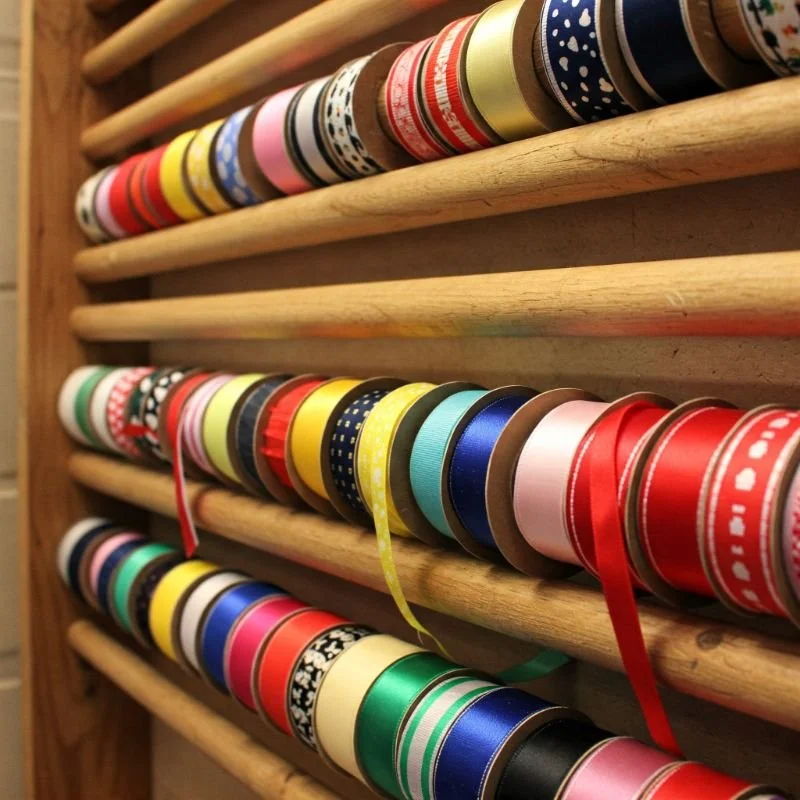
1. Repurpose a Wooden Dowel Rod System
Transform an ordinary wooden dowel rod into a ribbon organization masterpiece that combines functionality with visual appeal. Mount several wooden dowel rods horizontally on a wall or inside a cabinet, spacing them about 8-10 inches apart to accommodate different ribbon sizes. I discovered this method after struggling with tangled ribbon chaos for years—now my ribbons hang neatly, displaying their colors like an artist's palette. Simply slide your ribbon spools onto the rods, arranging them by color, type, or project needs. The beauty of this system lies in its accessibility; you can easily see your entire collection at a glance while keeping each ribbon tangle-free. For smaller spools, use tension rod dividers to prevent sliding. This storage solution works particularly well for crafters with wall space to spare and those who appreciate the visual inspiration of seeing their entire collection.
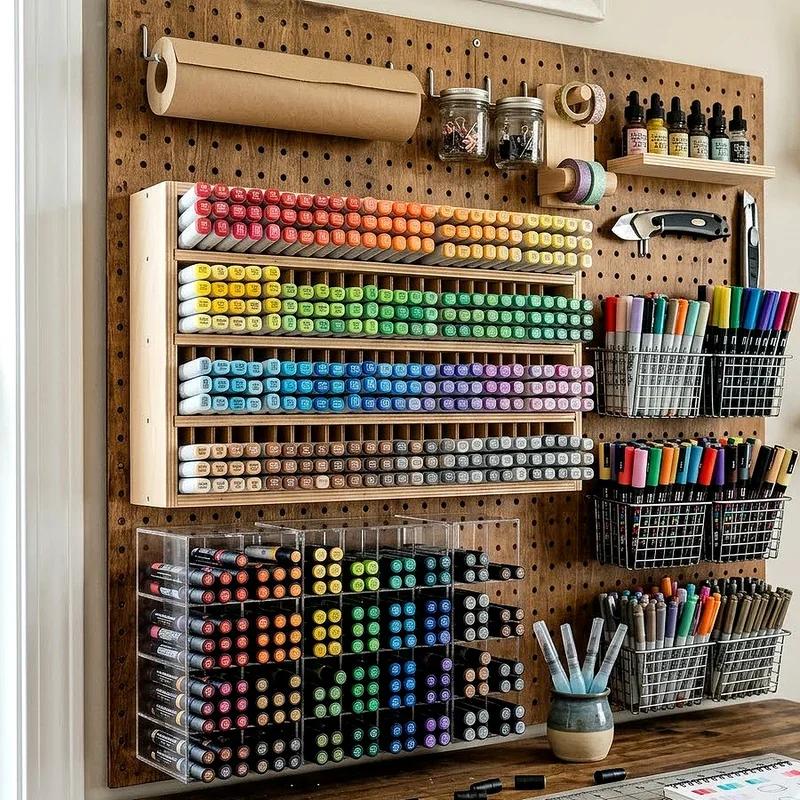
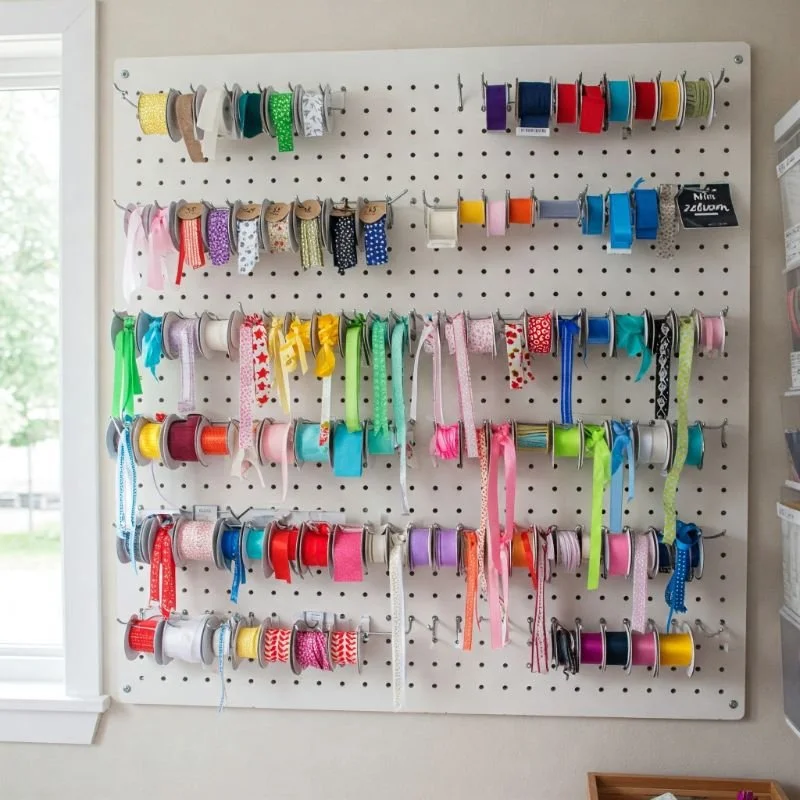
2. Create a Pegboard Ribbon Display Wall
Transform an ordinary pegboard into a ribbon crafter's dream display that combines storage with artistic inspiration. Mount a pegboard panel on your craft room wall, then insert pegboard hooks at various heights and spacing to accommodate your ribbon collection. The genius of this system lies in its customizability—rearrange hooks whenever your collection expands or changes. I've arranged my pegboard with color gradients flowing from light to dark, creating a functional rainbow that doubles as wall art. Use longer hooks for bulkier spools and shorter ones for delicate ribbons. Add small baskets attached to the pegboard for loose ribbon scraps that deserve saving. This solution turns your storage challenge into a design feature, inspiring creativity every time you glance at your organized collection. The pegboard system works wonderfully for visual thinkers who draw inspiration from seeing their materials.
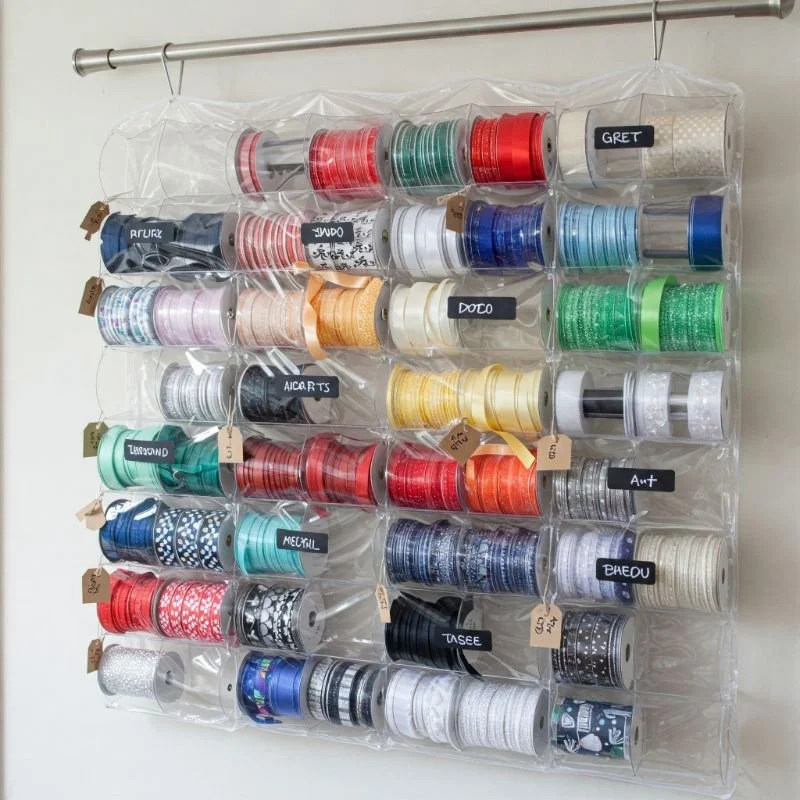
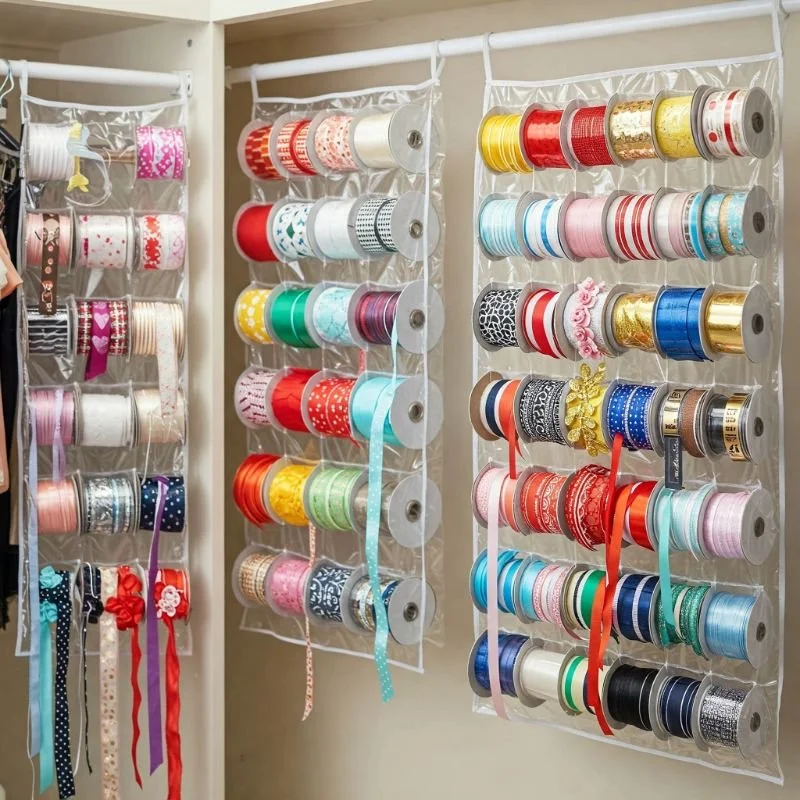
3. Utilize Clear Plastic Shoe Organizers
Repurpose an over-the-door shoe organizer into a ribbon storage system that maximizes vertical space while keeping everything visible. Those transparent pockets—originally designed for footwear—create perfect individual homes for ribbon spools of various sizes. I hang mine on the back of my craft room door, transforming previously wasted space into an organized ribbon library. Arrange ribbons by color family, width, or material type, creating a system that makes selection intuitive. The clear pockets allow you to see exactly what you have without rummaging through drawers or boxes. For smaller ribbon bits, dedicate specific pockets as "scrap collectors" organized by color. This solution costs less than $15 yet solves hundreds of dollars' worth of organizational headaches. The shoe organizer approach works especially well for crafters in small spaces who need to maximize every square inch without sacrificing visual organization.
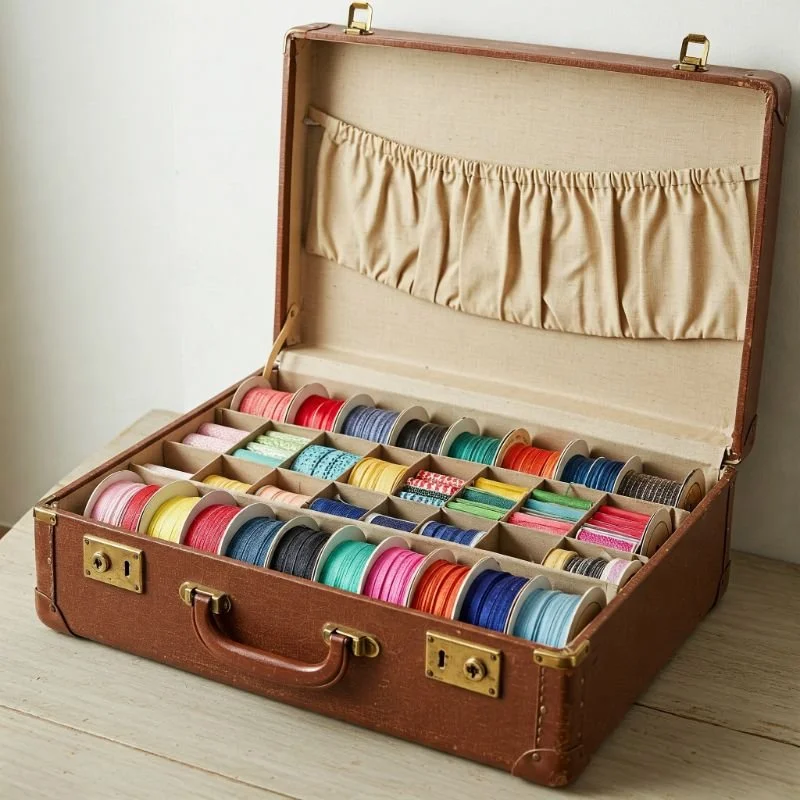
4. Convert Vintage Suitcases into Ribbon Storage
Transform nostalgic vintage suitcases into charming ribbon storage that adds character to your crafting space while keeping supplies organized. Install dowel rods across the width of an open suitcase, creating a series of bars from which to hang ribbon spools. I found a gorgeous 1950s Samsonite at a thrift store for $8 and turned it into a ribbon organizer that draws compliments from every visitor. The suitcase lid provides protection from dust and sunlight when closed, while hinge locks keep it open at the perfect angle during crafting sessions. Line the interior with decorative paper for an extra touch of personality. You can stack multiple suitcases of different sizes into a practical storage tower that doubles as room decor. This unconventional storage solution appeals to crafters who value aesthetic appeal alongside functionality, creating storage that you'll proudly display rather than hide away.
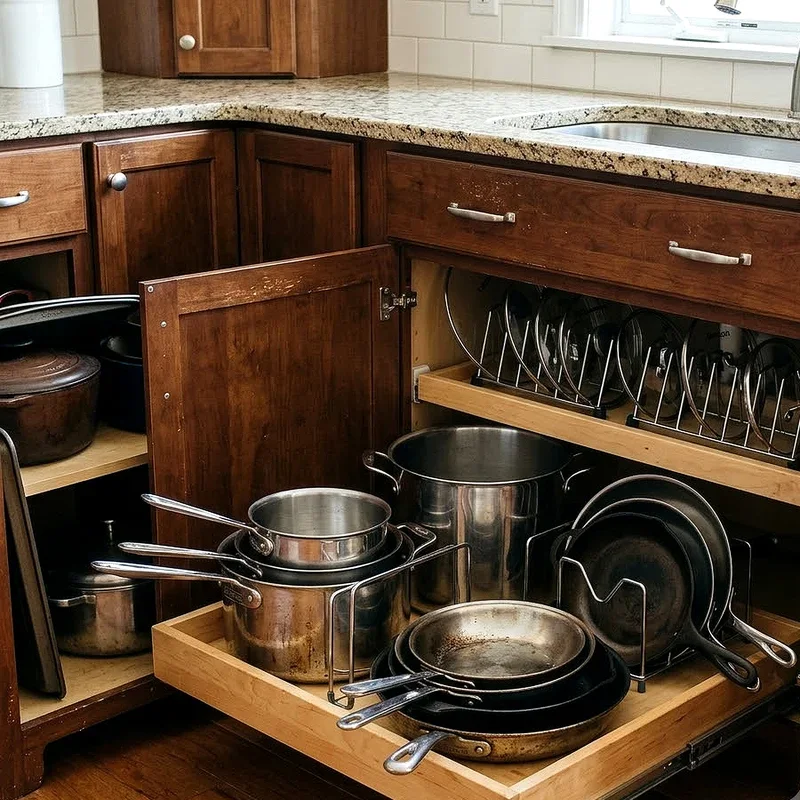
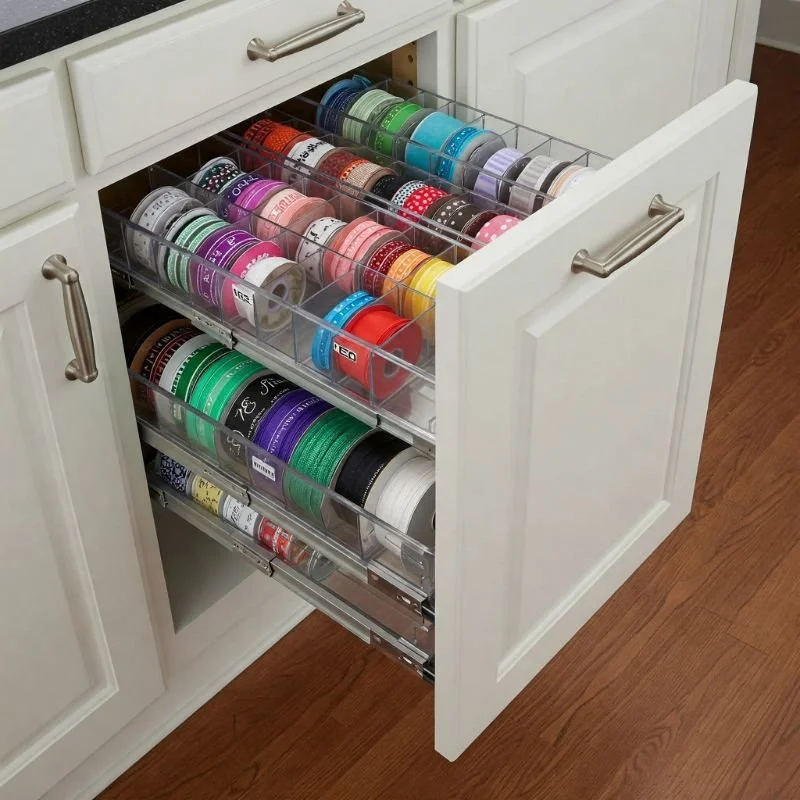
5. Install Pull-Out Cabinet Drawer Organizers
Transform ordinary kitchen cabinet organizers into ribbon storage solutions that maximize accessibility while minimizing visual clutter. Install pull-out drawer systems in cabinets or under craft tables, then add dividers sized perfectly for ribbon spools. I retrofitted my craft room cabinet with three pull-out drawers, creating separate zones for different ribbon types—satin in one, grosgrain in another, and specialty ribbons in the third. The sliding mechanism allows you to see every ribbon at once without digging through piles. Install small tension rods across the width of each drawer to create rows where ribbon spools can hang without tangling. Add labels to the drawer fronts for immediate identification. This system keeps everything hidden when not in use yet instantly accessible when inspiration strikes. It's particularly effective for crafters who prefer a clean, uncluttered aesthetic or those who need to use their crafting space for multiple purposes.
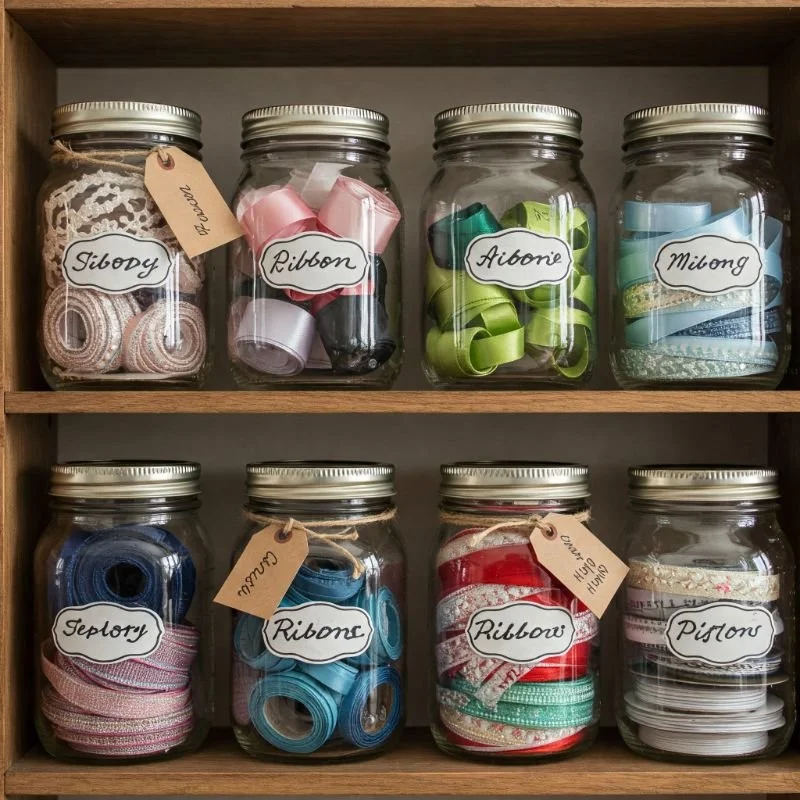
6. Use Mason Jars for Smaller Ribbon Pieces
Repurpose charming glass Mason jars into practical ribbon storage vessels that keep smaller pieces contained while adding vintage flair to your craft space. Choose jars in various sizes to accommodate different ribbon widths and lengths. I use quart-sized jars for wider ribbons and smaller jelly jars for narrow trims, arranging them on open shelving by color family. Pierce a small hole in each lid to allow the ribbon end to poke through for easy access without unwinding the entire contents. The transparent glass creates a beautiful display of colors and textures while keeping dust at bay. Add decorative labels or paint the lids in coordinating colors for both functionality and style. This method works particularly well for ribbon scraps and shorter lengths that don't warrant spool storage but are too precious to discard. Mason jar storage appeals to crafters who appreciate visible organization with a touch of rustic charm.
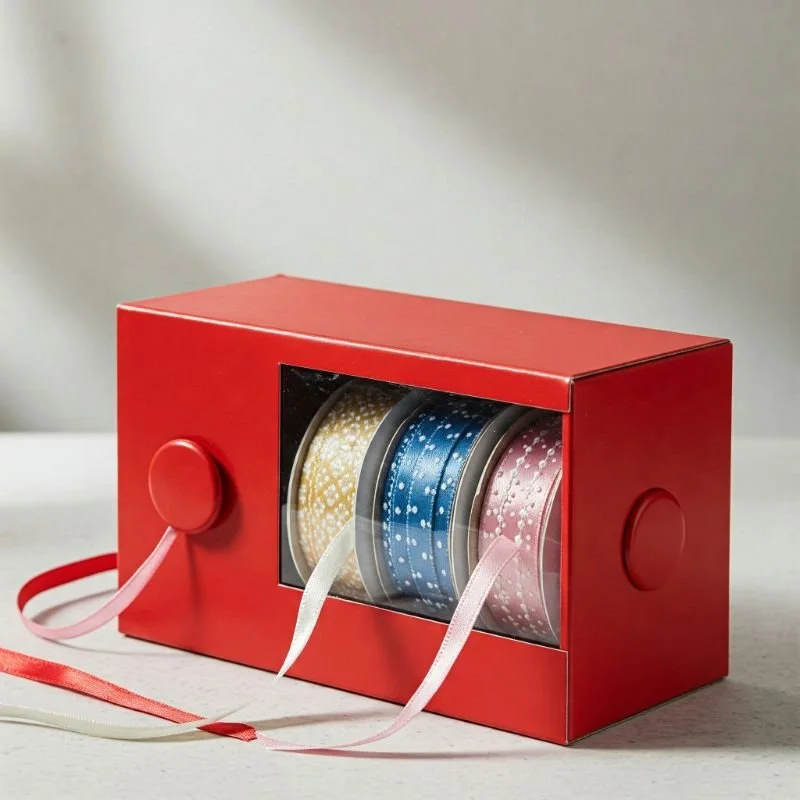
7. Craft a DIY Ribbon Dispenser Box
Create a customized ribbon dispensing station from a simple cardboard box that keeps ribbons contained while allowing easy access and cutting. Start with a sturdy shoe box or shipping container, then cut small holes along one side. I transformed an ordinary Amazon box into a dispenser that holds twelve ribbon spools, threading each ribbon's end through its designated hole. Install a dowel rod across the width to hold spools in place, and attach a metal ruler or strip along the edge for clean, straight cuts. Decorate the exterior with decorative paper or fabric to complement your craft space. The beauty of this system lies in its functionality—ribbons stay neatly on their spools inside the box while remaining instantly accessible when you need them. This solution works perfectly for active crafters who frequently use small amounts of ribbon and need quick access without creating mess. The dispenser concept keeps ribbons protected from dust and tangling while streamlining your workflow.
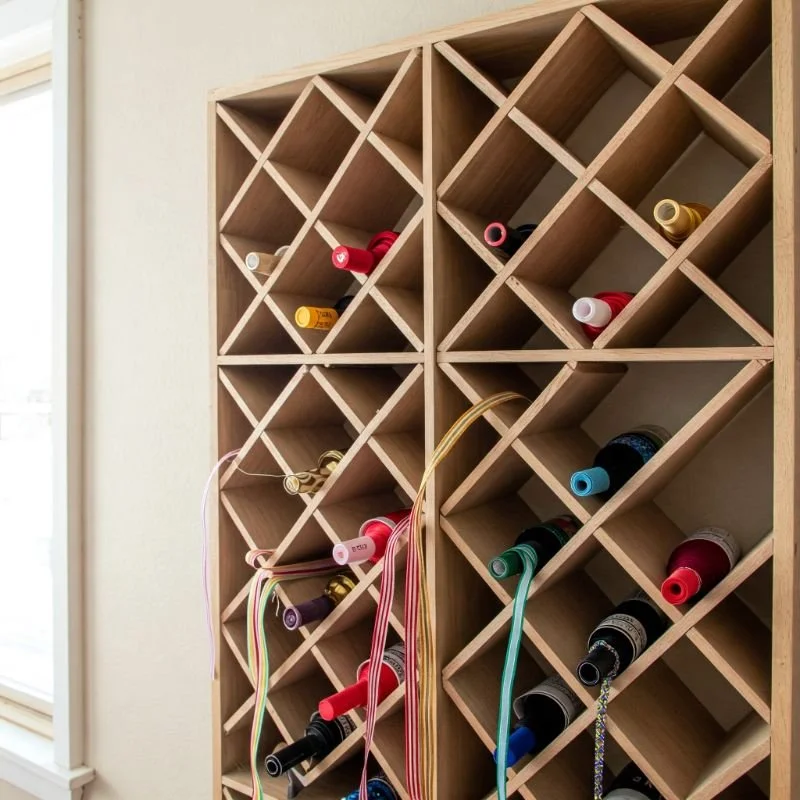
8. Repurpose Wine Racks for Ribbon Storage
Transform a wine rack into an innovative ribbon organization system that displays your collection like fine vintages while keeping each spool accessible and tangle-free. Traditional wooden wine racks with individual bottle compartments create perfect homes for ribbon spools of various sizes. I repurposed a twelve-bottle rack from a thrift store for $10, creating a ribbon display that combines practical storage with visual appeal. The compartments keep ribbons separate and prevent tangling, while the open design allows you to see your entire collection at a glance. Wall-mounted wine racks work particularly well for crafters with limited table space. For smaller spools, add cardboard tube extenders to prevent them from falling through larger compartments. This storage solution appeals to crafters seeking unique, conversation-starting organizers that don't scream "craft supplies." The wine rack method transforms ordinary storage into a design feature that enhances your creative space.
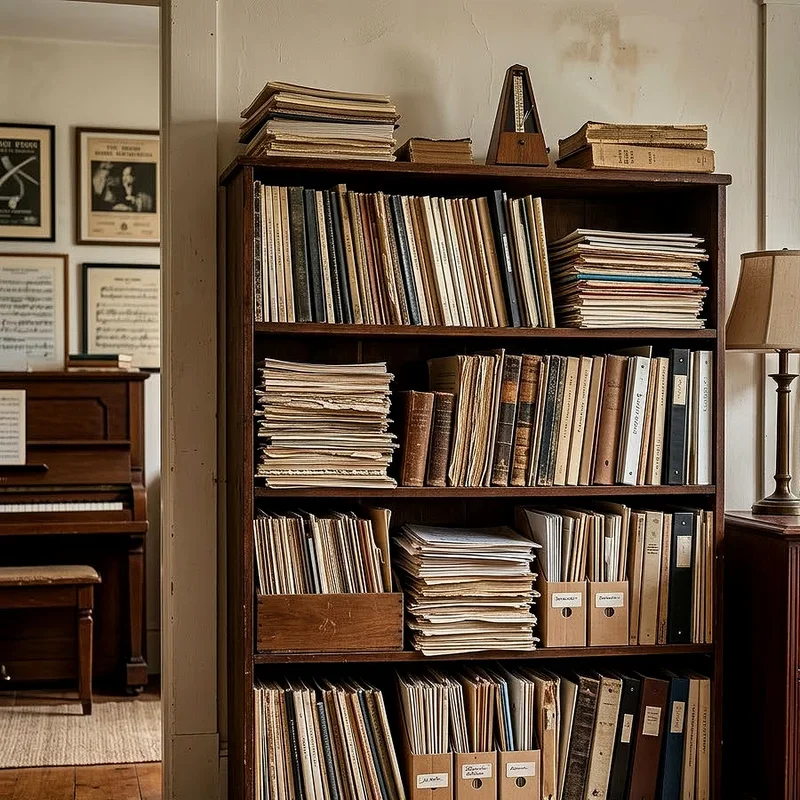
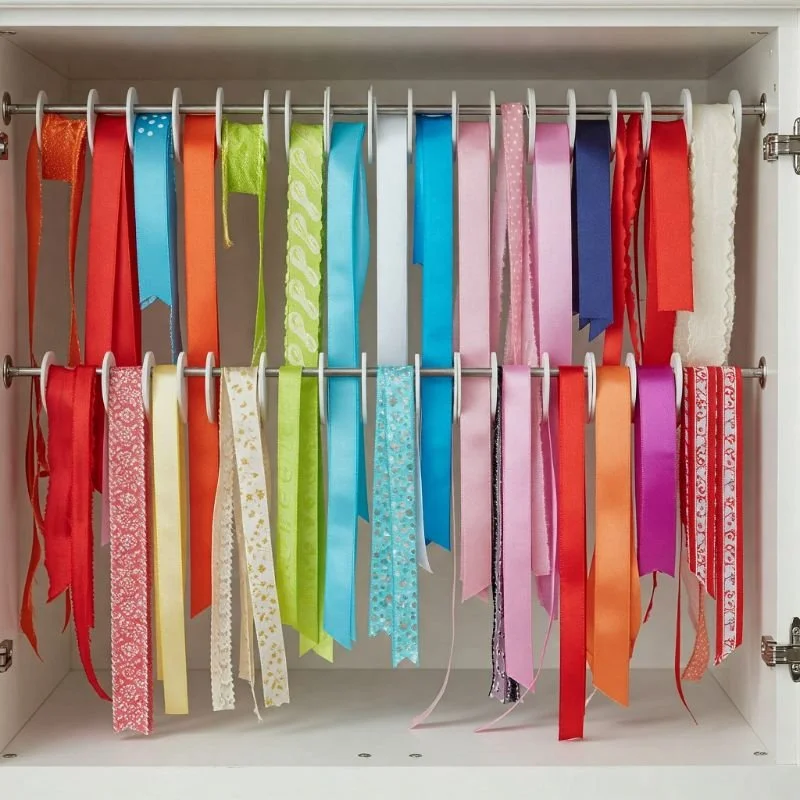
9. Hang Ribbons on Tension Rods in Cabinets
Install adjustable tension rods inside cabinets or bookshelf units to create customizable ribbon hanging systems that maximize vertical space. Position several rods at different heights, creating rows for ribbon spools to slide onto easily. I transformed an ordinary bookshelf into ribbon storage central by adding six tension rods, organizing spools by color families across different levels. The tension rods cost less than $20 total yet solved years of ribbon storage frustration. The beauty of this system lies in its adjustability—move rods higher or lower as your collection changes. For cabinets with doors, this method keeps ribbons dust-free yet instantly accessible. Add small S-hooks to hang ribbon remnants wrapped around cardboard bobbins. This approach works wonderfully for crafters with existing cabinet or bookshelf space who need an organization solution without purchasing additional furniture. The tension rod method creates order without requiring permanent installation—perfect for renters or those who frequently rearrange their creative spaces.
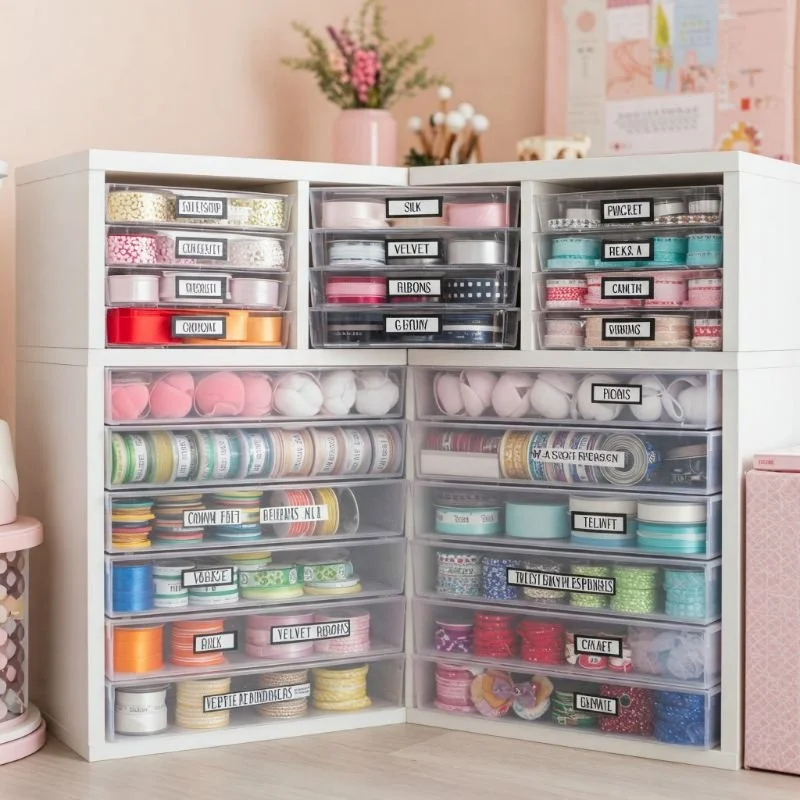
10. Organize with Stackable Plastic Drawer Systems
Harness the versatility of clear stackable drawer systems to create customized ribbon storage that grows with your collection while keeping everything visible and protected. Select drawer units with various depths—shallow for narrow ribbons and deeper drawers for bulkier spools. I use a combination of six-drawer and three-drawer units, organized by ribbon type and color. The transparent drawers eliminate guesswork, allowing you to see exactly what's available without opening every compartment. Create dividers within drawers using foam board or plastic grid sections to prevent spools from rolling together. Label each drawer with specific categories that match your crafting habits—seasonal ribbons in one, project-specific collections in another. This system adapts easily as your collection expands; simply add another stackable unit. The plastic drawer approach appeals to crafters who value protection from dust and humidity alongside visual organization. It's particularly effective for collections that include delicate or specialty ribbons requiring extra care.
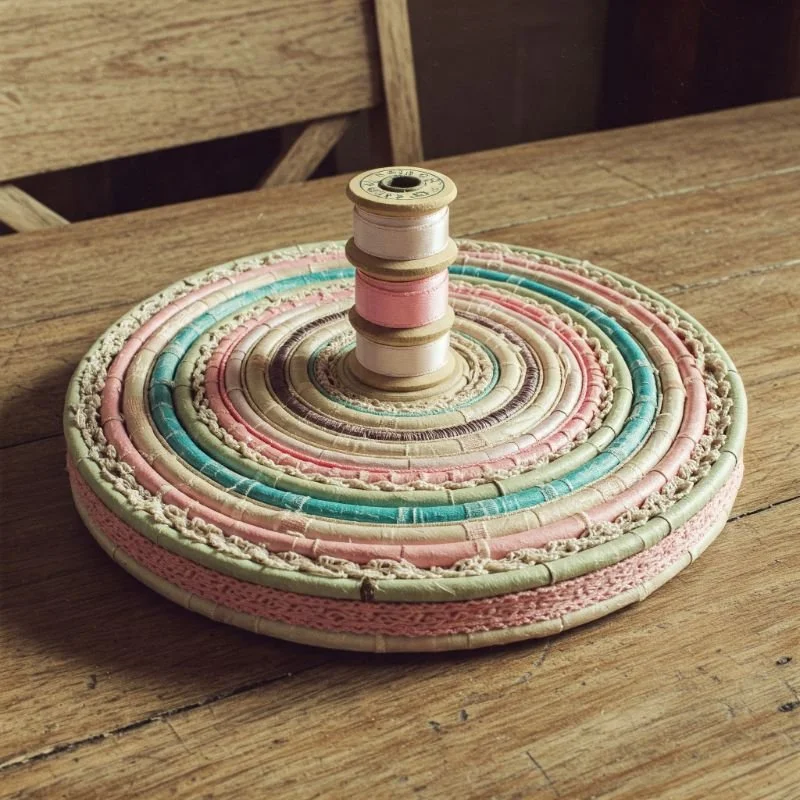
11. Create a Ribbon Spool Lazy Susan
Design a rotating ribbon organizer that puts your entire collection at your fingertips with a simple spin, combining accessibility with space efficiency. Mount a lazy Susan mechanism on a wooden base, then attach dowel rods vertically around the circumference. I created mine using a 16-inch wooden circle with eight dowels, accommodating nearly forty ribbon spools in the footprint of a dinner plate. The rotating design eliminates digging through containers or drawers—simply spin to find exactly what you need. Arrange ribbons by color flowing in rainbow order around the carousel for a visually pleasing effect. Add a second tier for expanded storage capacity using a smaller circle and shorter dowels. This solution shines on craft tables with limited space, keeping frequently used ribbons within arm's reach without sacrificing valuable work area. The lazy Susan concept is perfect for active crafters who frequently switch between different ribbons during projects and need immediate access without disrupting creative flow.
12. Utilize Hanging Closet Organizers
Repurpose hanging closet organizers into dedicated ribbon storage systems that maximize vertical space while creating distinct compartments for different types. Select canvas organizers with various pocket sizes—larger compartments for bulky spools and smaller pockets for ribbon remnants and narrow trims. I hang mine on a decorative hook in my craft room corner, transforming wasted space into functional storage. The cascading design creates a waterfall effect of organization, with each ribbon type assigned to its own level. Roll loose ribbon pieces around cardboard bobbins before storing to prevent tangling. The hanging system allows you to categorize by project, color, or material type, keeping related items together. Add picture labels to each compartment for quick visual identification. This solution works exceptionally well for crafters with limited floor space who need to utilize vertical storage opportunities. The closet organizer approach combines the accessibility of visible storage with the protection of enclosed compartments.
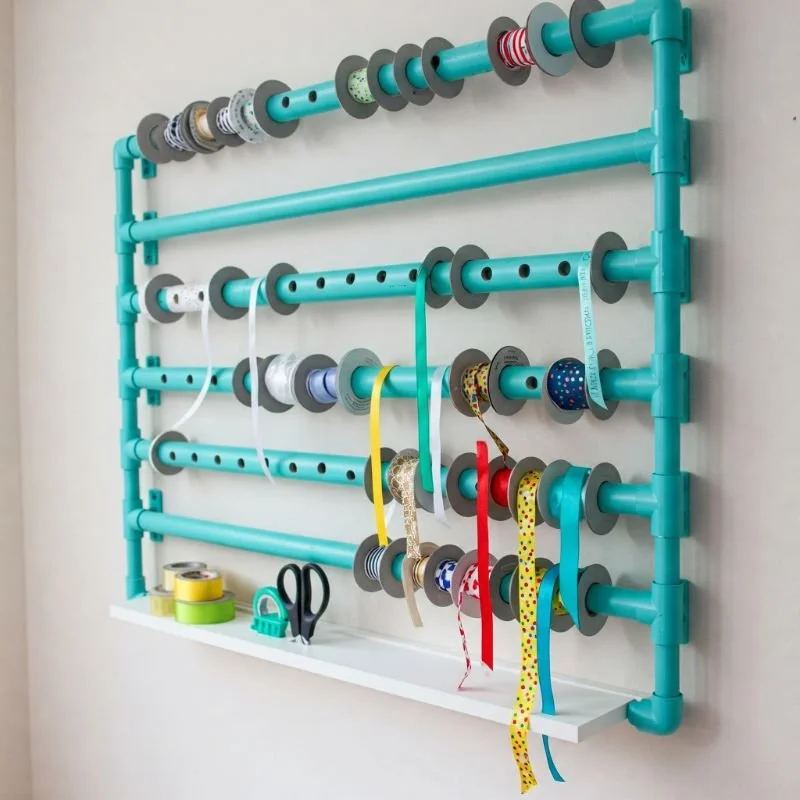
13. Design a Wall-Mounted PVC Pipe System
Create an industrial-chic ribbon organization system using PVC pipes that turns ordinary plumbing supplies into clever craft storage. Cut PVC pipes into 12-inch lengths, then mount them horizontally on a wall board using pipe straps. I installed twelve 2-inch diameter pipes in three rows, creating storage for nearly 50 ribbon spools in just two square feet of wall space. The open ends make sliding ribbons on and off effortless, while the sturdy construction prevents sagging even with heavier spools. Paint the pipes in coordinating colors or leave them white for a clean, modern aesthetic. Add small labels to the pipe ends indicating ribbon types or colors stored within each tube. This system works brilliantly for larger collections that would overwhelm traditional storage solutions. The PVC approach combines durability with visual organization, keeping ribbons accessible without creating clutter. It's particularly effective for crafters with abundant wall space who need substantial ribbon storage capacity.
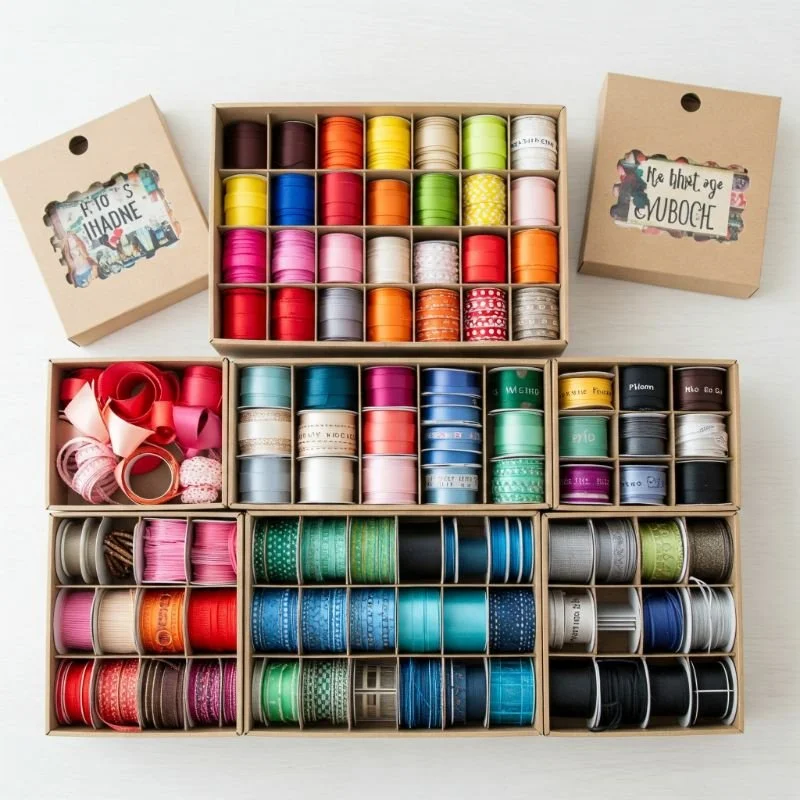
14. Transform Photo Storage Boxes for Ribbons
Repurpose photo storage boxes into perfectly sized ribbon organizers that stack neatly while protecting delicate materials from dust and light damage. These specialized boxes—designed for 4×6 photos—create ideal homes for ribbon spools stored vertically like little soldiers. I use twelve photo boxes on my craft room shelf, color-coded by ribbon type—blue boxes for blue ribbons, red for red, and so on. The visual system makes selecting the right box intuitive. Add dividers cut from cardboard to create dedicated sections within each box, preventing spools from tangling together. The boxes' uniform size creates a tidy, cohesive appearance when stacked or arranged on shelves. Label each with detailed contents using decorative tags for both function and style. This storage solution appeals to crafters concerned about preserving ribbon quality over time, particularly those with silk or vintage ribbons that require protection from environmental factors. The photo box method combines archival-quality protection with space-efficient organization that looks intentional rather than utilitarian.
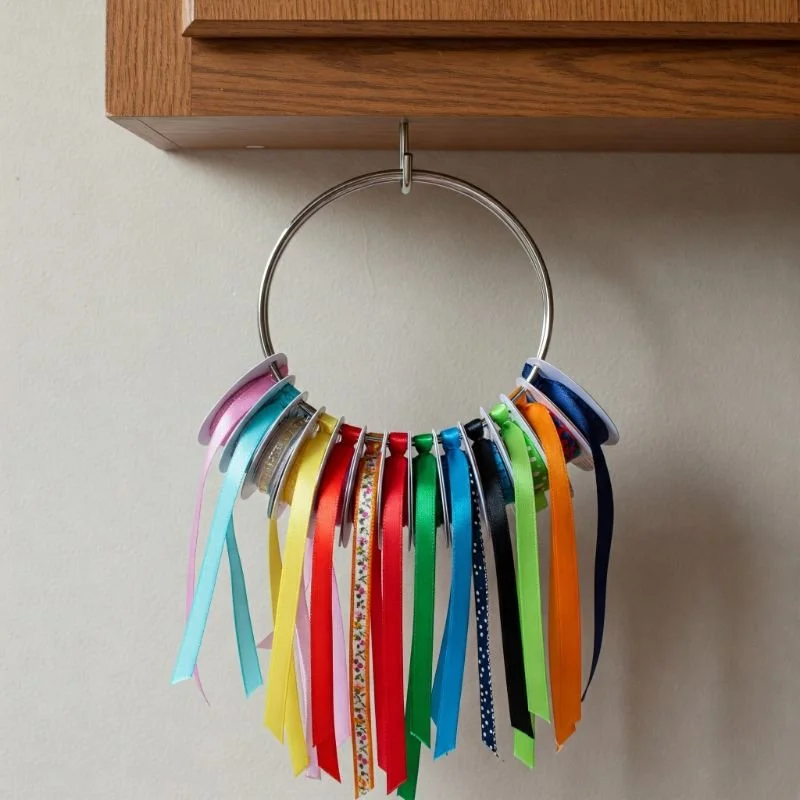
15. Implement a Binder Ring and Hanging Hook Method
Develop a space-saving vertical storage system using simple binder rings and hooks that keeps ribbon remnants organized and visible without requiring dedicated furniture. Thread ribbon remnants onto large binder rings, grouping by color, width, or material type. I maintain eight rings—organized by color spectrum—hanging from decorative hooks on my craft room wall, creating a functional art piece from materials that would otherwise tangle in drawers. For each ribbon piece, fold the end over and punch a small hole for the ring to slide through. The binder rings allow you to flip through options like pages in a book, seeing every piece without untangling a mess. Add small labeled divider tags between sections for enhanced organization. This method excels at managing smaller ribbon pieces that don't warrant spool storage but remain useful for projects. The binder ring approach is particularly effective for crafters working in tight spaces who need to maximize vertical storage opportunities. It transforms ribbon management from frustrating to intuitive while keeping materials visible for creative inspiration.
Conclusion
Transforming ribbon chaos into creative opportunity doesn't require expensive solutions—just thoughtful approaches that match your specific crafting style and space constraints. The perfect ribbon storage system acts as a silent assistant, keeping your materials ready when inspiration strikes while preventing the frustration of tangled messes. By implementing one or several of these fifteen ideas, you'll not only organize your current collection but create a flexible system that accommodates future ribbon acquisitions. Remember that the best organization system is one you'll actually maintain, so choose methods that align with your natural habits. Your newly organized ribbon collection awaits, ready to infuse your next project with color, texture, and tangle-free creativity!
Frequently Asked Questions
1. How should I organize ribbons by color or type?
Frequent crafters should organize by type first, then color; occasional users benefit from color-first organization.
2. What's the best storage solution for limited space?
Over-door shoe organizers and vertical PVC pipe systems maximize storage while minimizing footprint.
3. How can I prevent ribbon ends from fraying during storage?
Secure ends with small clips or fold and secure with mini safety pins.
4. Should I wind all ribbon remnants onto bobbins?
Wind pieces longer than 18 inches; store smaller scraps by color in clear jars.
5. How often should I reorganize my ribbon collection?
Evaluate your system quarterly, adjusting as your crafting habits and collection evolve.
Stay up to date with our latest ideas!